


Did you know that e-commerce sales exceeded 6 trillion USD in 2023 and are still growing, accounting for about 20% of global retail sales? With the unprecedented growth of e-commerce, transitioning your offline business to an online platform is not just an upgrade; it’s a strategic necessity.
That’s when Shopify comes into the picture. As a game-changer in the world of e-commerce solutions, Shopify offers a blend of user-friendliness and powerful features. This guide is designed to meticulously navigate you through migrating your business to Shopify, ensuring a smooth transition with the expertise of professional developers.
We’ll delve into each step of the journey, from initial planning to the final launch, providing actionable insights and expert tips. Whether you’re taking your first steps in e-commerce or seeking to expand your digital footprint, this guide demystifies technical complexities and paves the way for a successful online venture.
Embark on this transformative journey with an expert Shopify Development Company, as we help elevate your business to new digital heights with Shopify.
Before we delve deeper, let’s clarify why moving your offline business online is a crucial step today.
- Know Why You Must Get Your Offline Business Online
- Choose a Website Builder
- A Complete Guide to Migrate Your Offline Business to Shopify
- 1. Create Your Shopify Account
- 2. Choose a Plan for the Shopify Store
- 3. Set Up Your Shopify Store
- 4. Selecting a Theme
- 5. Customizing the Layout
- 6. Add More Pages & Content
- 7. Add Products, Create Inventories, and Organize Them
- 8. Set Up Shipping
- 9. Setting Up Payment Gateways and Payouts
- 10. Check for Additional Relevant Settings
- 11. Add Must-Have Shopify Apps
- 12. Launch Your Store
- Examples of Successful Brands on Shopify
- Why Hire Shopify Developers for Creating a Shopify Web Store?
- Conclusion
Know Why You Must Get Your Offline Business Online
Currently, 64% of small businesses have their own websites. Moreover, 79% of consumers purchase online at least once a month, and it is predicted that 95% of purchases will be made online by 2040.
In today’s digital age, moving your offline business online is not just a trend; it’s a strategic decision with the potential for a profound impact on your business’s growth and sustainability. Let’s explore why embracing the digital transition is essential and the benefits of doing business online:
- Broader Reach: The internet breaks geographical barriers, enabling businesses to reach a wider audience beyond their local area. This global exposure can increase brand recognition and customer base.
- Cost-Effectiveness: Online businesses often incur lower startup and operational costs than traditional brick-and-mortar establishments, saving on rent, utilities, and sometimes staffing.
- Enhanced Customer Insights: Digital platforms provide advanced analytics tools, offering valuable insights into customer behavior, preferences, and feedback, allowing for more effective product and service tailoring.
- 24/7 Availability: An online business can operate round the clock, unlike physical stores with set hours, increasing convenience for customers and sales opportunities.
- Adaptability and Scalability: Online businesses can swiftly adapt and scale, whether it’s updating their product catalog, adjusting pricing, or expanding services.
- Eco-Friendly Operations: Online businesses often have a smaller environmental footprint by reducing the need for physical materials and space, appealing to modern eco-conscious consumers.
Understanding these benefits, you’re now poised to lead your business towards significant growth and success by moving online. Let’s look at the next steps.
Choose a Website Builder
The first step in creating your online store or website is to choose a suitable website builder. Website builders are user-friendly tools for creating and customizing web pages, offering drag-and-drop interfaces that eliminate the need for coding knowledge. Using a website builder is the quickest way to establish a business website. Key features of most website-building software include:
- Themes and templates for rapid development
- Diverse customization options
- Drag-and-drop design tools
- Optimization features for your website, marketing, and sales
- AI-powered content creation tools
Over time, you may wish to add custom features to your basic website, possibly requiring changes to HTML and CSS files. The best website builders allow you to modify your code and manage your site directly. Considering these factors, Shopify emerges as an optimal website builder.
Shopify Website Builder
Shopify’s website builder is versatile and suitable for developing various types of websites, not limited to e-commerce sites.
It offers 24/7 live support, customizable, mobile-responsive templates, and comprehensive features to engage your audience when you’re ready to start selling or promoting your content.
The platform is equipped to handle payments, lead and customer data collection, and email automation. To learn how to build a Shopify website in detail, follow the step-by-step guide below.
A Complete Guide to Migrate Your Offline Business to Shopify
Here is a complete guide to building a Shopify e-commerce website on your own. However, for better customization and operability, consider enlisting the help of an expert Shopify website developer.
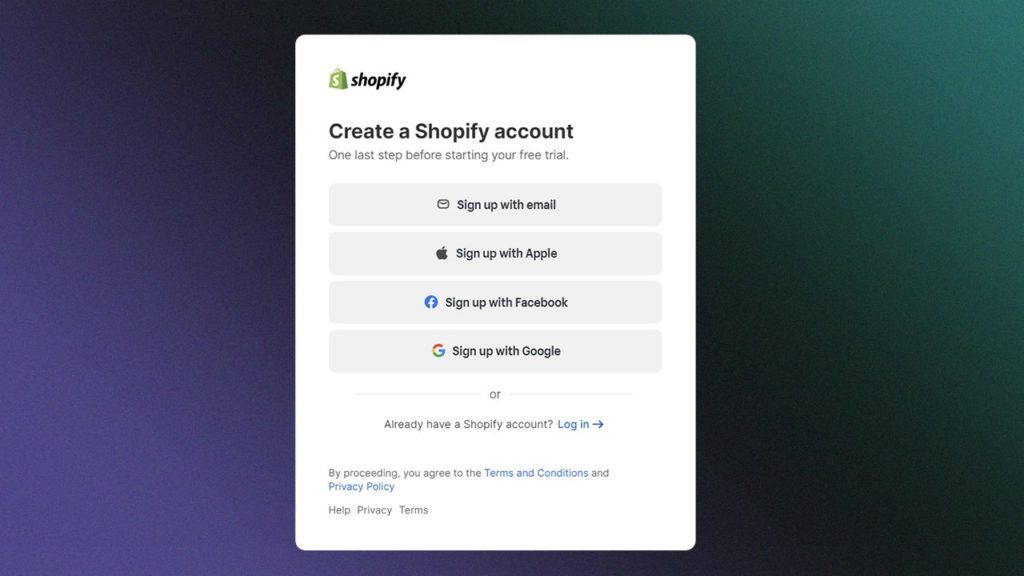
1. Create Your Shopify Account
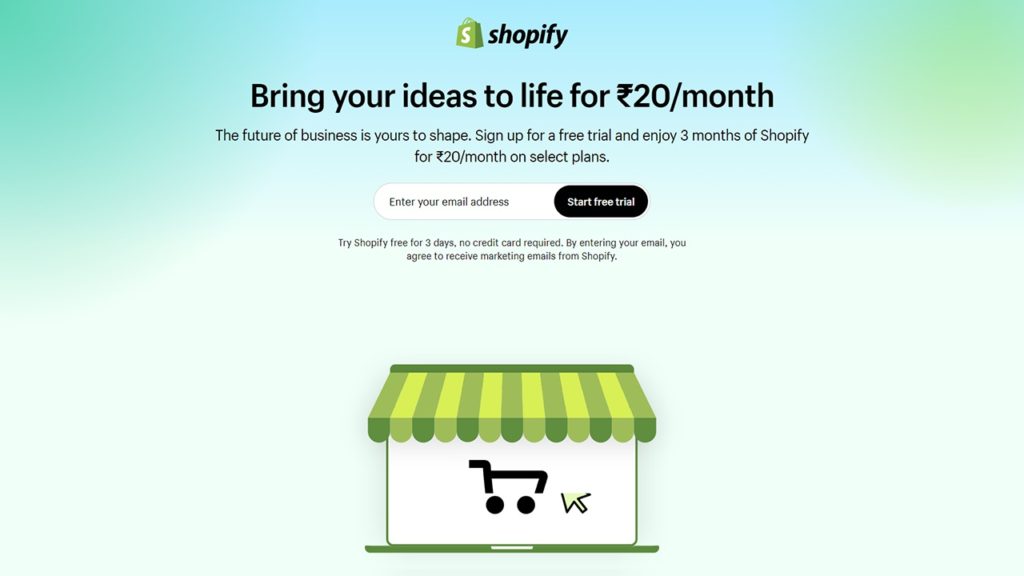
Start by registering an account with Shopify. Currently, Shopify offers a 3-day free trial, followed by a minimal cost of just INR 20/month for the next three months. This pricing structure is especially beneficial for entrepreneurs eager to launch their online store on a tight budget.
Note: Prices may vary depending on your country.
Initially, you’ll need just your email address and a few basic details for registration.
Upon signing up, Shopify will ask you questions about your business and the kind of website you wish to build.
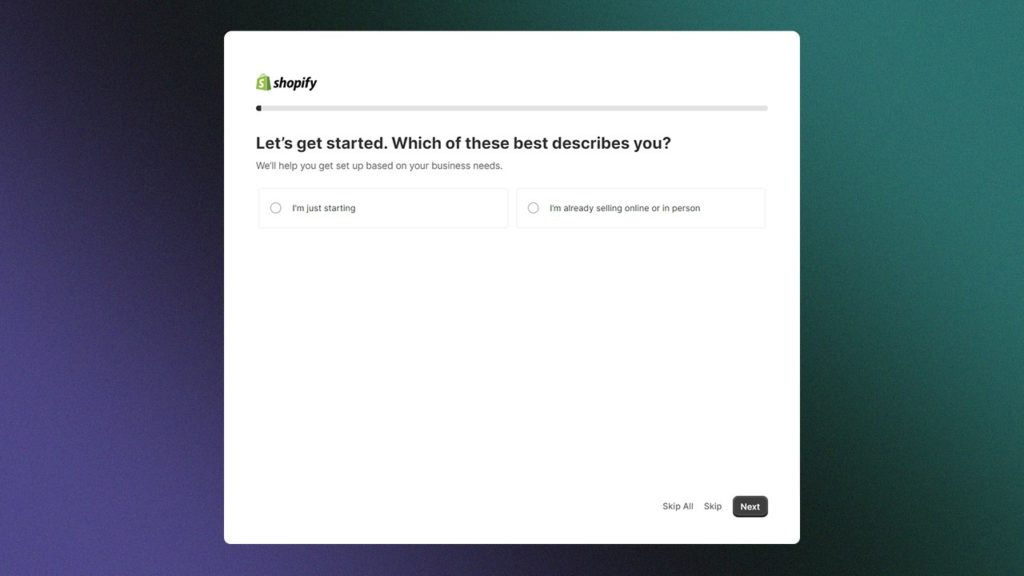
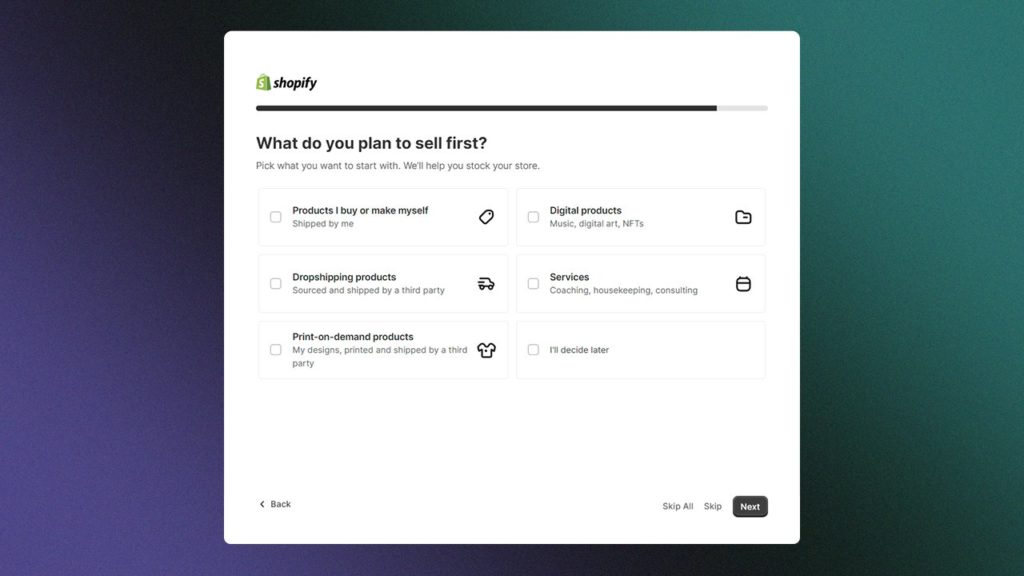
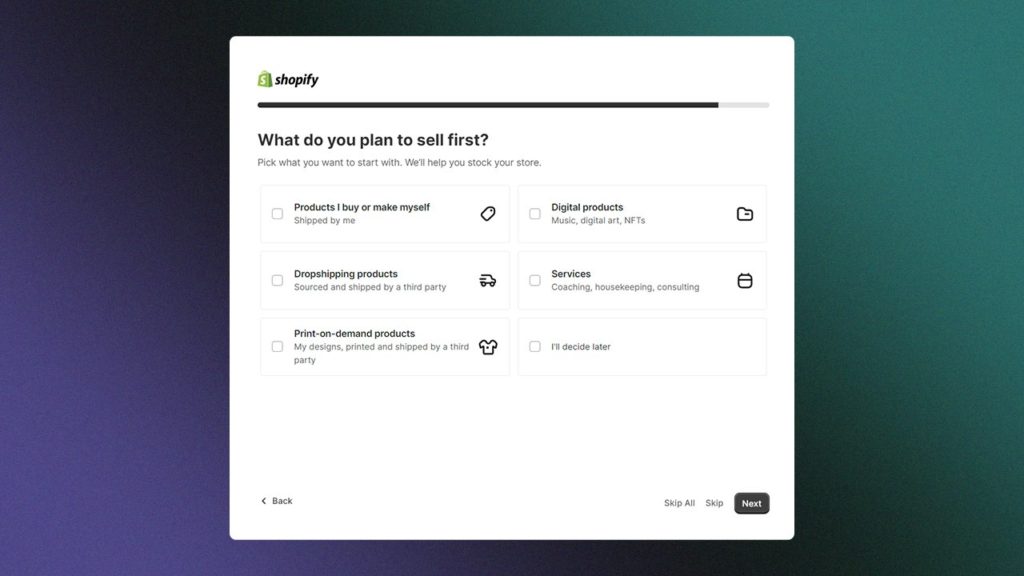
While these questions are optional, providing detailed information enables Shopify to tailor the setup guide to your specific needs.
After responding to Shopify’s queries, you’ll gain access to your new Shopify account!
2. Choose a Plan for the Shopify Store
After account creation, you need to choose a plan to continue using Shopify’s services post-free trial. Shopify offers three main plans: ‘Basic’, ‘Shopify’, and ‘Advanced’. For the first three months following the free trial, any plan is available for only INR 20. This period allows you to understand your business requirements and decide which plan is most suitable.
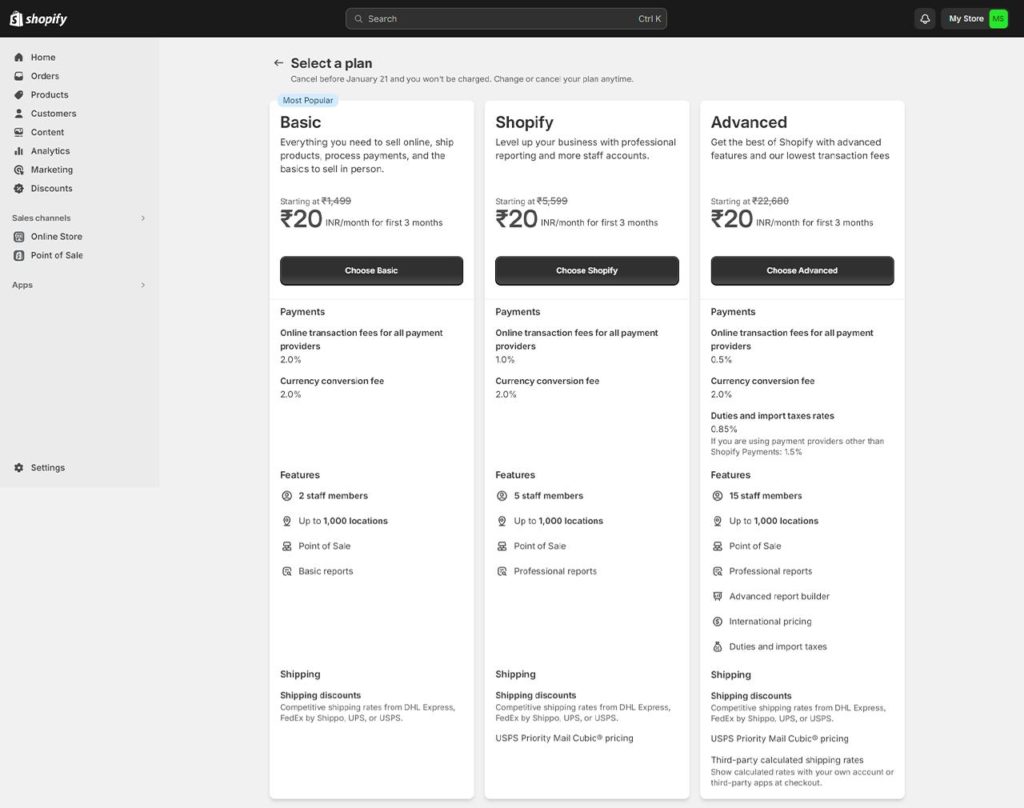
Post three months, the pricing will follow the standard rates.
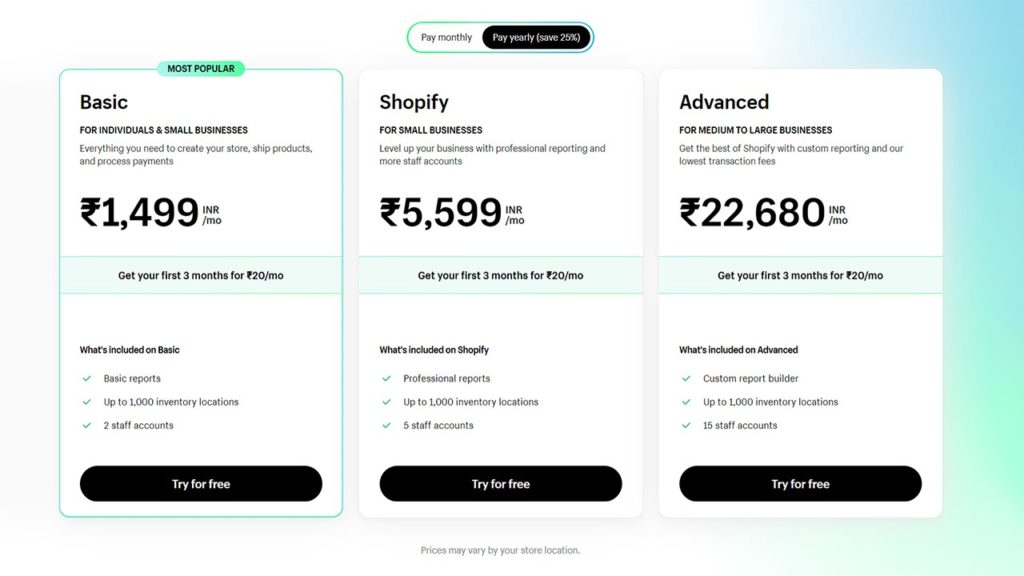
Most new users start with the Basic plan. However, if you have an existing retail business or are transitioning from another e-commerce platform, the Shopify plan might be more fitting.
Each plan includes essential tools for online sales. The Basic package even comes with POS connections for retail transactions. The mid-tier package offers perks like discounted Shopify payment rates, extra staff accounts, shipping benefits, e-commerce automation, and enhanced reporting.
You can select your plan after registering for the free trial if you’re still undecided.
3. Set Up Your Shopify Store
Once you’ve chosen a plan, familiarize yourself with your store’s dashboard. Here, a menu on the left provides access to various features such as orders, products, customers, and settings.
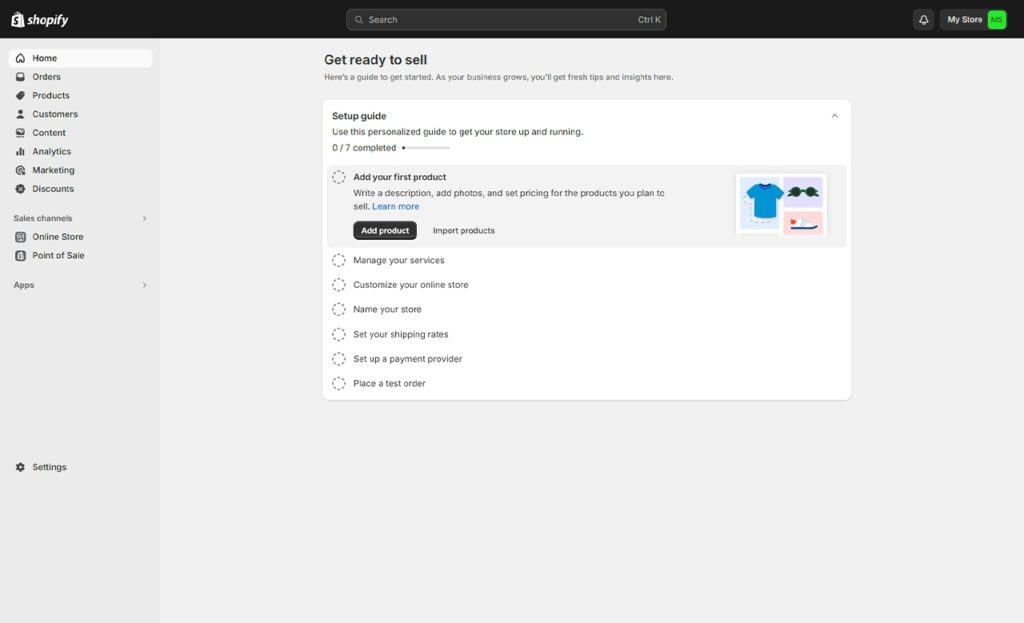
In the settings area, located at the bottom left, you can adjust your store’s name, currency, and time zone.
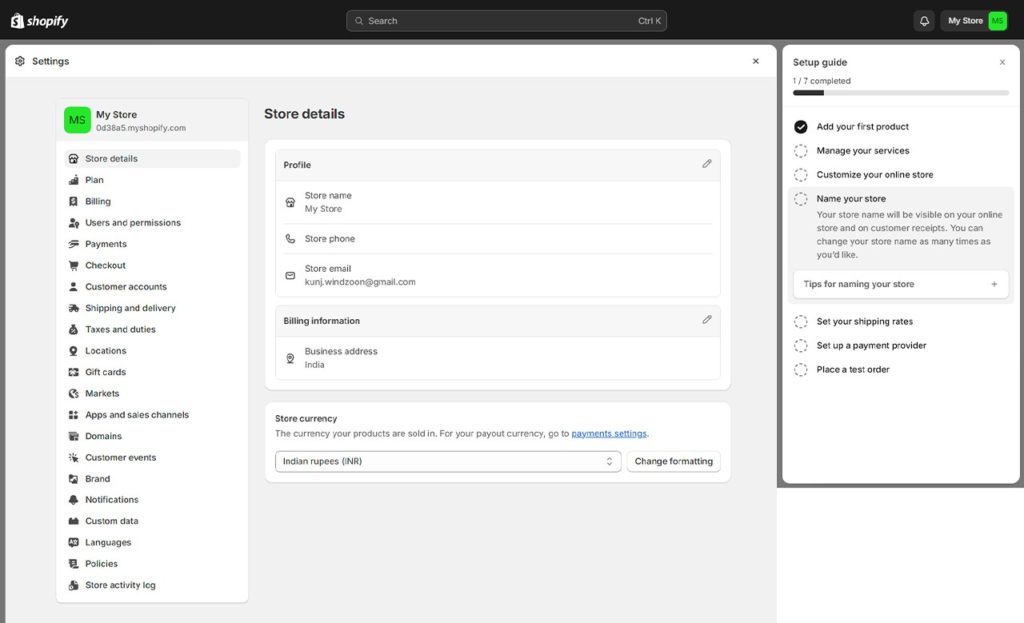
With these basic settings in place, you’re ready to personalize your store.
4. Selecting a Theme
Your store initially comes with a default theme. To give it a unique flair, visit the ‘Online Store’ section under ‘Sales Channels’ in the left sidebar.
Click on ‘Explore free themes’ to browse a selection of designs, all available for free use.
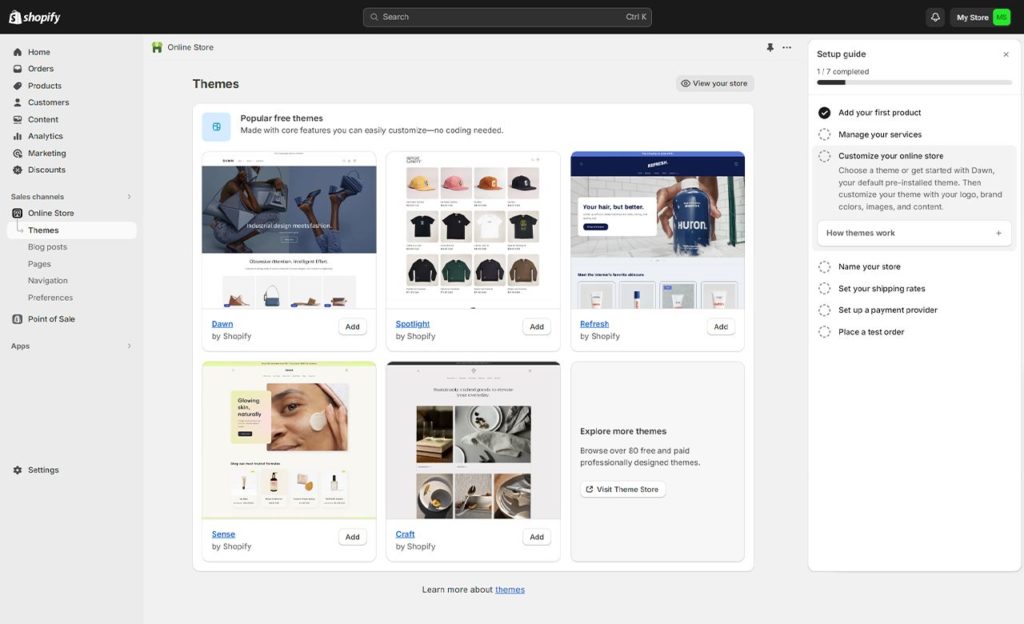
Also, what sets Shopify’s themes apart is their industry-specific design. Whether you’re in retail, the restaurant industry, or any other sector, these themes are tailored with features and layouts that fit your niche.
For more exclusive designs, explore premium themes for purchase in the ‘Theme Store’, accessible from the free themes gallery. When choosing a theme, consider the details to ensure it aligns with your brand’s aesthetic.
Remember to read reviews of both free and paid themes to understand others’ experiences – what they appreciate and what they don’t.
Shopify also features a unique showcase of real stores using each theme, providing a practical view of how your store could look and demonstrating the features in real-world applications.
5. Customizing the Layout
Personalizing your online store is the best way to ensure it truly reflects your brand. To customize, navigate to the selected theme and click on ‘Customize.’
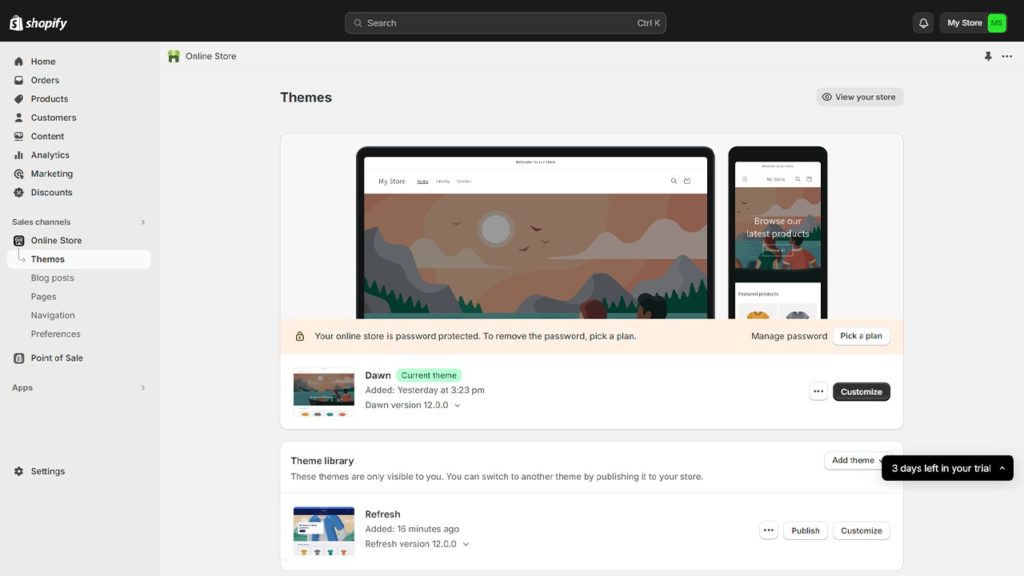
This launches the theme editor in a new window.

On the left side of the editor are various tools that allow you to modify text, insert buttons, upload custom images, and more. On the right is a live preview, showing real-time updates of your store as you apply these changes.
Hovering over a specific section will highlight it with a blue outline. Clicking on this section enables editing. This method minimizes common mistakes associated with drag-and-drop editing, providing a smoother and quicker design process as you refine your store’s appearance.
Remember, to fully capitalize on these customization options, understanding their proper use is key. If this seems daunting, seeking assistance from a Shopify expert developer can enhance your store’s quality and functionality.
6. Add More Pages & Content
To further develop your web store, add more pages and content. Stay on the live builder screen or return to the setup guide and select “Pages.” In the new window, click “Add Pages” to include additional pages, content, and a navigation menu.
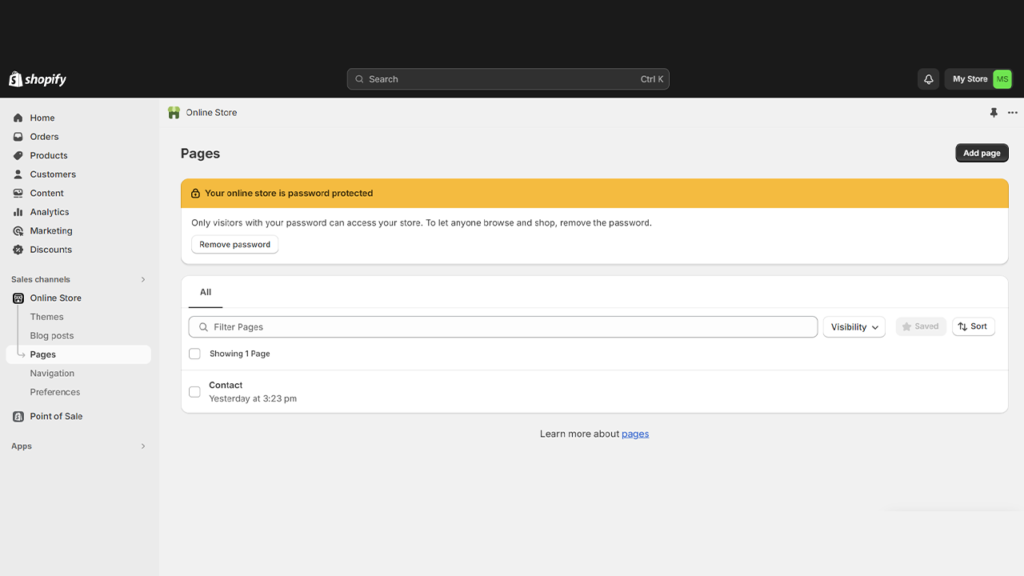
This is where you can create essential pages like ‘About Us’ and ‘Contact.’
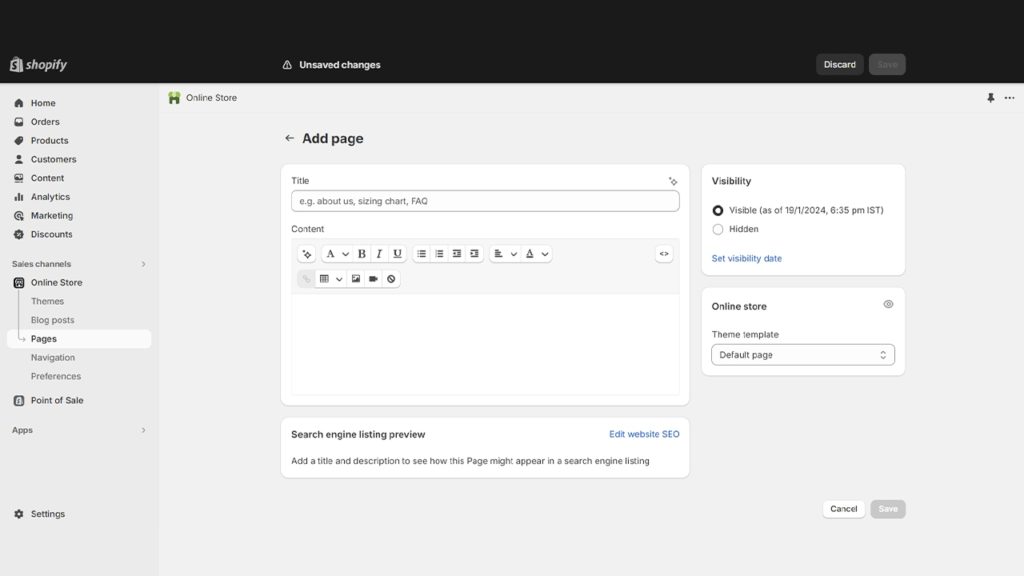
Consider adding a blog to share detailed stories or personal insights about your business, products, or services, which adds depth and personality to your online presence.
Now, let’s focus on adding revenue-generating elements: your products and services.
7. Add Products, Create Inventories, and Organize Them
Products bring your Shopify store to life. To start populating your store, navigate to the “Products” tab in the Navigation Menu and click on “Add Product” at the center of the page. You’ll be presented with a form to enter details such as:
- Product name
- Product Description
- Product images
- Status (active or draft)
- Pricing information
- SKU
- Barcode
- Shipping information
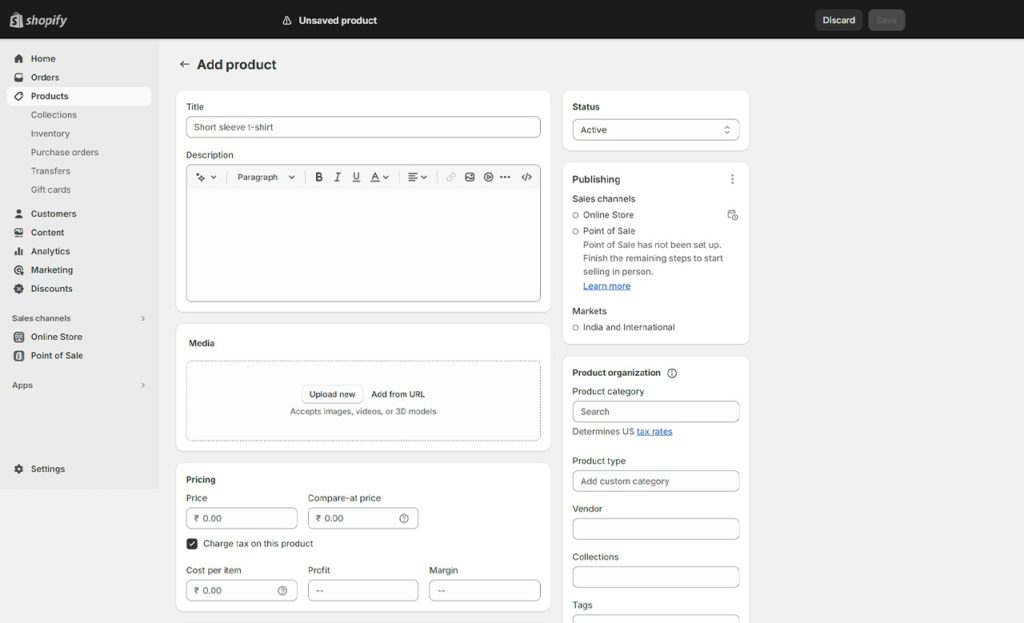
Shopify enables inventory tracking and SEO listing customization, enhancing your product’s visibility in search engine results.
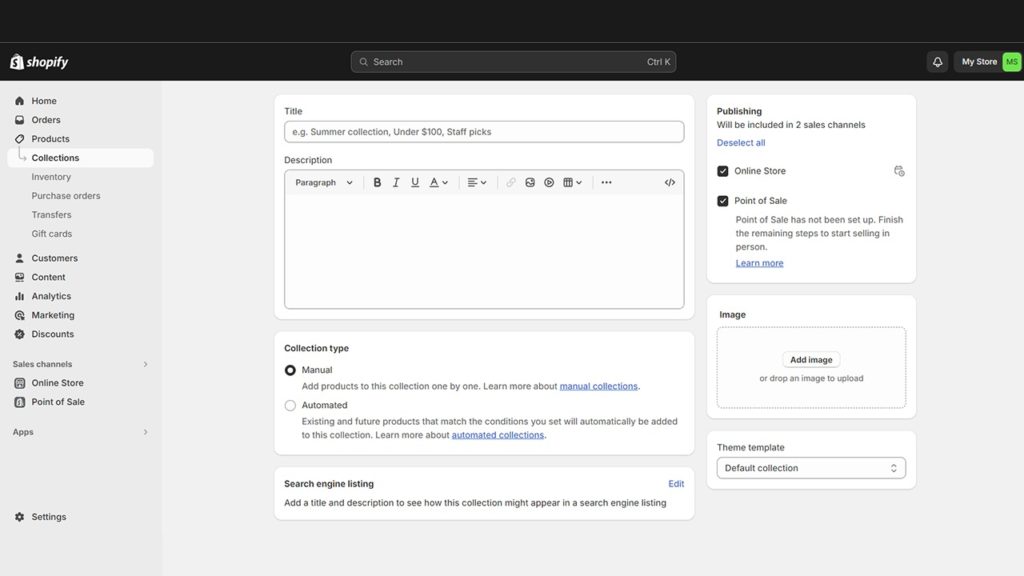
Another feature is the creation of product collections, which are galleries grouped by categories. Collections can be created manually, where you select and add products individually, or automated, where products are included based on set conditions like price, product type, inventory level, vendor, or custom tags.
Collections improve the shopping experience by making it easier for customers to browse and purchase. For stores with numerous items, collections are vital for maintaining organization.
Investing effort in detailing your products and organizing your store enhances its discoverability and attractiveness online. If you encounter challenges or confusion while organizing your products or services, consider reaching out to a Shopify expert agency in India.
8. Set Up Shipping
Establishing an efficient shipping system is crucial for your Shopify store. Delayed deliveries can drive customers away. To manage shipping, go to “Settings” and select “Shipping and Delivery.”

To create a successful shipping strategy:
- Add Your Shipping Location: By default, your store will use the address provided during Shopify signup. Include any other fulfillment networks you use.
- Create Shipping Profiles: Your store starts with a single shipping profile. If you have a diverse customer base, create additional profiles for different shipping needs.
- Establish Shipping Zones and Rates: Shipping zones allow you to group regions under the same rate, ensuring customers within a zone are charged uniformly.
Correct shipping settings are essential for customer satisfaction and the success of your Shopify store.
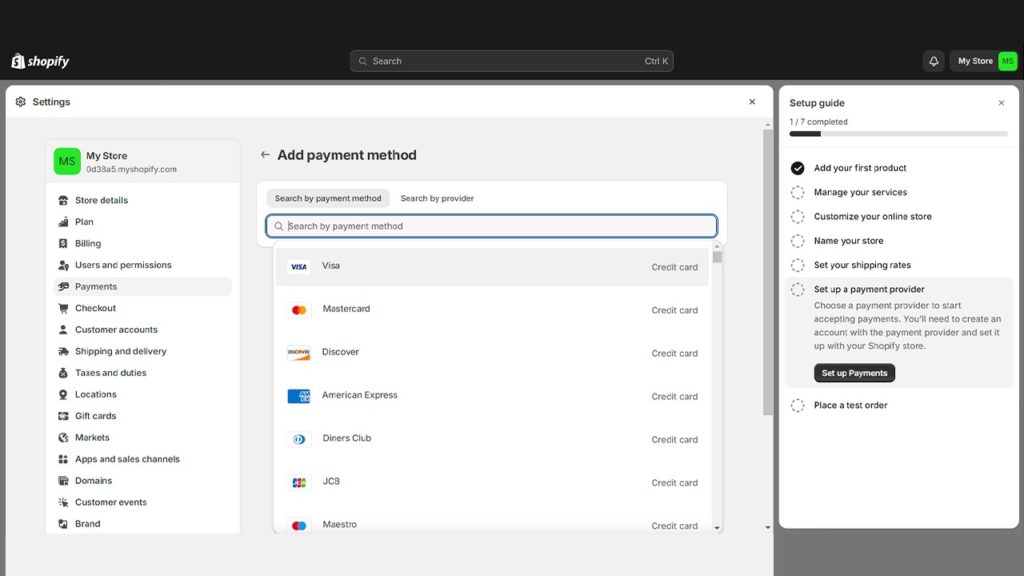
9. Setting Up Payment Gateways and Payouts
A crucial step in finalizing your Shopify store setup is integrating payment methods. To enable customer checkouts, select a payment provider in the ‘Payments’ section, accessible under ‘Settings’ or through the setup guide. You can activate Shopify Payments, PayPal, or another payment provider.
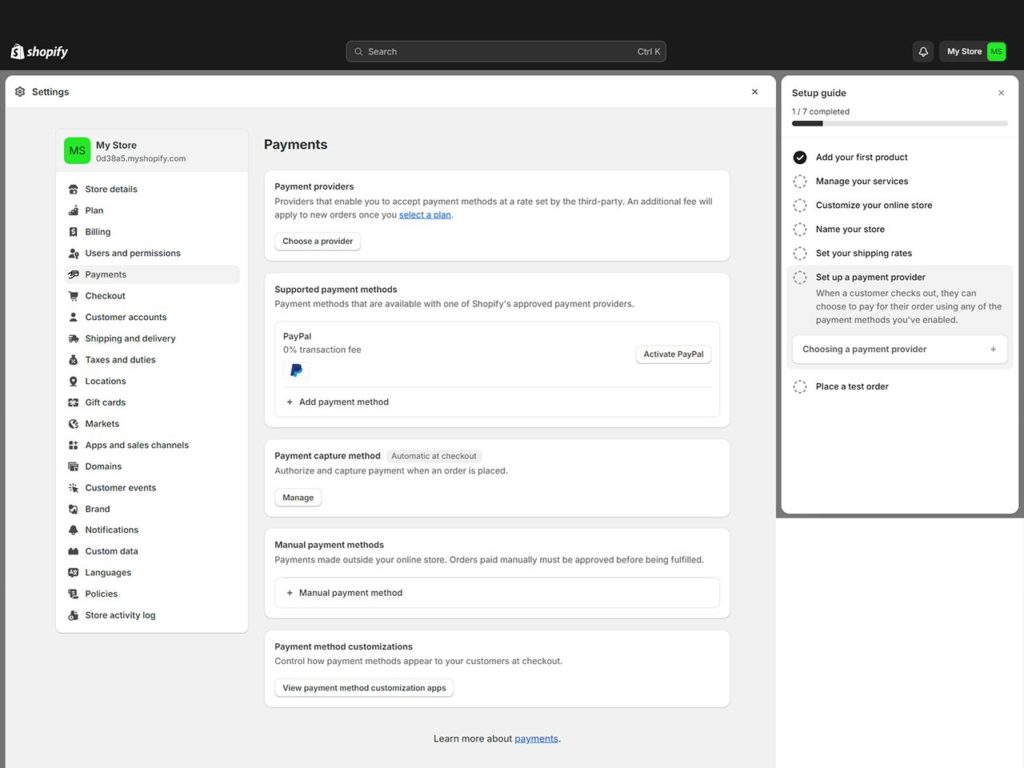
Click ‘Activate Shopify Payments’ and follow the straightforward setup instructions. If you prefer PayPal or a different third-party provider, explore these options by clicking on ‘See all other providers’ beneath the main activation button. For a more systematic payment setup, consider contacting a Shopify expert in India.
10. Check for Additional Relevant Settings
Review your store for any final adjustments, such as adding legal disclosure pages, preparing marketing reports, enabling notifications, setting up the checkout process, and formulating your online customer strategy. These elements are accessible and manageable from the comprehensive list in the settings sidebar.
11. Add Must-Have Shopify Apps
To enhance your store’s functionality in handling purchases, customer service, payment gateways, and reporting, consider adding Shopify apps. Setting up Shopify Point Of Sale (POS) can also be vital for efficient management.
Shopify’s higher-tier pricing plans provide these advanced features. Alternatively, explore plugins and applications in the Shopify app store to integrate third-party services, with options ranging from free to subscription-based.
For selecting and installing the best apps for your store, enlist the help of a skilled Shopify developer. Their expertise can streamline the process and maximize the benefits of your chosen apps.
12. Launch Your Store
After completing your pre-launch checks, publish your store by removing password protection. Remember, this option is not available during the free trial, so ensure you’ve chosen a plan before going live. To remove the password, go to Online Store > Preferences and find the ‘password protection’ section.
Congratulations, your store is now live and ready for e-commerce success!
Begin by opening your store to the public and initiating marketing campaigns to attract potential customers. In the dashboard, click on “Marketing” in the left sidebar and start setting up your first campaign.
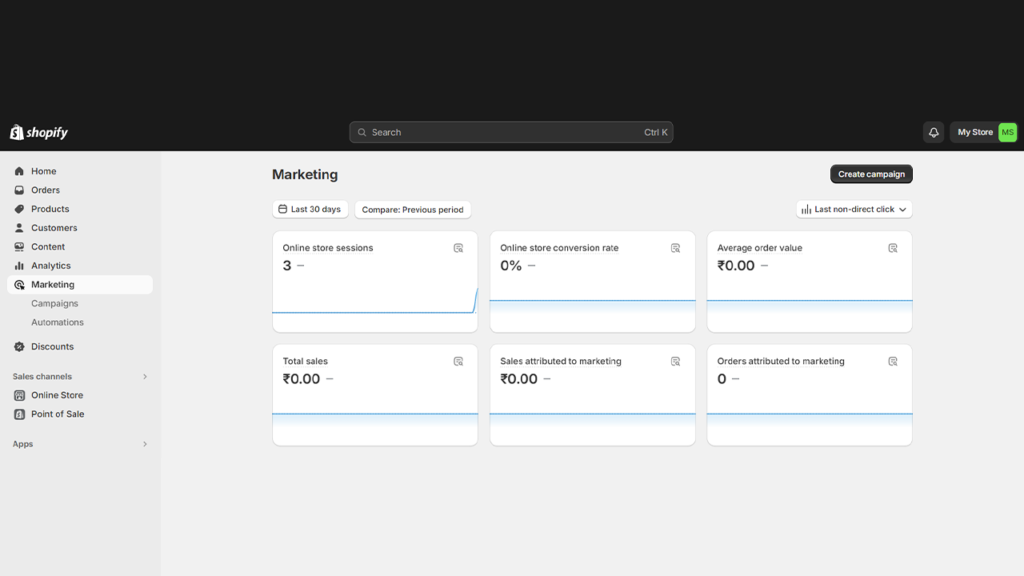
You can create and monitor Google and Facebook ads directly on Shopify. Click the “Create campaign” button in the top right corner to choose from recommended options like ads, emails, social media, or even SMS campaigns.
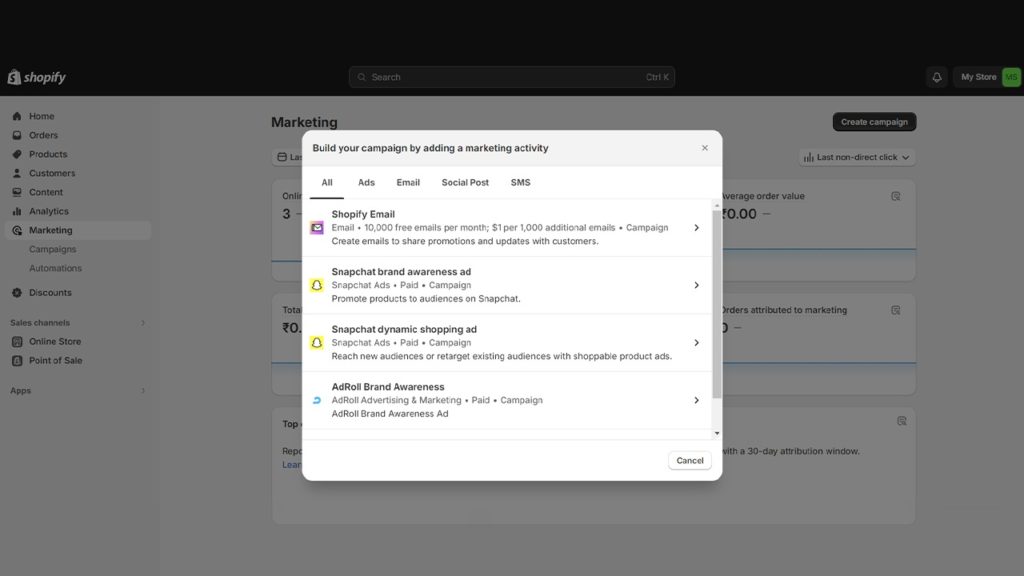
Each platform offers easy-to-follow setup steps, simplifying your marketing efforts.
Managing campaigns on Shopify is user-friendly. You can edit, pause, delete, or archive them for future reuse. Remember, effective marketing requires patience and persistence. If time is limited or you lack digital marketing expertise, consider hiring a professional.
Examples of Successful Brands on Shopify
Heinz’s Innovative Shift to E-Commerce
Amid the pandemic, Heinz rapidly launched a direct-to-consumer site on Shopify Plus within just a week. This move, necessitated by lockdowns, highlights both the platform’s flexibility and Heinz’s quick adaptation to market changes.
Bailey Nelson’s Global E-Commerce Success
As a standout Shopify user, Bailey Nelson, a globally recognized eyewear retailer, has skillfully used the platform to market a fashionable range of frames, sunglasses, and eye care products. Over the last seven years, the brand has leveraged Shopify’s customizable framework and global reach, achieving impressive sales milestones.
Red Bull’s Energetic Online Presence
A leader in the energy drink industry, Red Bull has marked its territory as a notable Shopify user. Since its inception and entry into the U.S. market, Red Bull has recorded substantial revenues, including approximately $1.6 billion in U.S. sales in 2021. Their Shopify site, launched in 2015, offers a diverse range of products, including apparel and team merchandise, and features collaborations with brands like Aston Martin for exclusive products.
MCaffeine’s Vibrant Online Store
As India’s first caffeinated personal care brand, MCaffeine targets the dynamic millennial market with its unique caffeine-infused product line. The brand’s Shopify site is distinguished by its visually attractive product presentation and interactive features, enhancing the overall customer shopping experience.
JB Hi-Fi’s Remarkable Growth on Shopify Plus
A leading name in home entertainment retail, JB Hi-Fi has experienced significant success on Shopify Plus, becoming the largest retailer on the platform and the seventh-largest in Australia. Their shift to Shopify Plus has been notably fruitful, with a remarkable 18% increase in online sales in Australia in the second half of 2019, demonstrating the platform’s effectiveness in supporting business growth and digital sales.
Why Hire Shopify Developers for Creating a Shopify Web Store?
Your website is not a static entity; it requires ongoing updates and enhancements. Regularly introducing new features, updating projects, and adding fresh content are crucial to maintaining relevance and competitiveness. Efficiently managing these aspects often necessitates the skills of a Shopify developer.
An expert Shopify developer provides specialized knowledge and experience, crucial for ensuring that your store is not only functional but also optimized for peak performance and sales. Their proficiency in customizing themes and integrating advanced features align with your specific business needs and customer preferences, essential for creating a seamless, user-friendly shopping experience. This directly influences customer satisfaction and conversion rates.
Additionally, a professional developer can adeptly handle technical SEO, boosting your store’s visibility and search engine ranking. Keeping abreast of the latest e-commerce trends and tools, their insights are invaluable for maintaining your store’s competitiveness.
While self-building a store might be cost-effective initially, the long-term advantages of a professionally developed Shopify store – improved reliability, scalability, and revenue potential – justify the investment.
Conclusion
Transitioning your offline business to Shopify with the aid of expert developers is a strategic step towards digital transformation and market expansion. This guide has detailed the essential steps of this journey, from choosing a website builder to customization and launch.
Leveraging Shopify’s comprehensive platform, along with the expertise of professional Shopify website developers, can significantly enhance your online presence, streamline operations, and offer an exceptional customer experience. Partner with Windzoon Techno Pvt. Ltd. to explore new opportunities and hire Shopify expert developer for a prosperous digital future.
Our team consists of skilled and experienced Shopify expert developers who will aid you in building a custom Shopify web store as per your business requirements. To know more about us and avail of our Shopify Development Services, contact us and get a quote.
 +91 9904713335